 |
Showing posts with label Tutorial. Show all posts
Showing posts with label Tutorial. Show all posts
Tuesday, April 14, 2015
Allure Insiders Get The Look: Game Of Thrones Khaleesi
Did you watch Game of Thrones the other night? Were you all, "the eff is going on?" or was it just me? There are so many damn characters on that show that I sometimes can't keep up.
One character I can keep up with is that gorgeous-ass Khaleesi. So, of course, I had to do a GoT hair and makeup tutorial inspired by her. Because I want to ride around on dragons. Or something.
Watch if you're so inclined. You know how I do.
Pin It
Tuesday, March 17, 2015
Allure Insiders Get The Look: Madonna's "Ray Of Light"
Madonna's latest album came out last week, so I had to celebrate in the only way that I know how; with a hair and makeup ode to the queen.

If you're into Madonna in her "Ray of Light" years (see what I did there?), check this out.
Pin It
Sunday, March 15, 2015
Tipsy Tutorials: Classic Beauty Look
This might be the dumbest thing I've ever done. (I got tipsy and made a makeup tutorial, if that wasn't clear.) Watch at your own braincell risk, man.
Then watch this.
Because I'm sorry and shit.
Pin It
Tuesday, November 11, 2014
Allure Insiders Get The Look: The Hunger Games Capitol Retrospect
It's almost time for The Hunger Games: Mockingjay, Part 1 (??? I don't know the format of these titles). Whatever the hell you want to call it, I'm excited about it.
If you want to relive the heyday of the Capitol (I don't know, maybe you're all #TeamPresSnow), watch my Allure Insiders video for a makeup look inspired by the Capitol. But wearable-ish. May the odds be ever in your favor, and all.
Pin It
Wednesday, October 22, 2014
A Crazy-Easy Fall Face, With A Bonus Mini ColourPop Haul
I did a combo video today. Like those gross pretzel-with-fake-pizza-cheese things, but hopefully 100% less gross. And more pizza-y.
It's one part easy Fall makeup tutorial, one part mini haul for ColourPop, one part rambling river mouth. (How many parts are there? It's unclear, much like my trains of thought.)

Here are the lip colors I talked about, in a collage where they look eerily similar. They are in fact different. Here's the top shade and here's the bottom. See? Totally...different.

And as promised, here are swatches and close-ups of the shadows. Pretty amazing, right? You can check out all the available shadows here.
I have to go do some shit. AKA this:

Pin It
Saturday, October 18, 2014
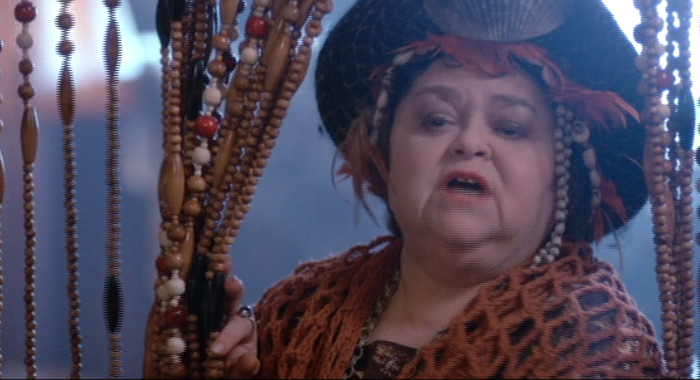
The Halloween Tutorial You've Always Wanted In Your Life: Honey Boo Boo
 |
| I'm such an old. I can't even do peace fingers the "cool" way. |
Are you guys all hyped for Halloween? That shit is my favorite time of year. You can look completely ridiculous and not get one single judgey look. So I felt it necessary to do a solid Halloween tutorial.
And because I'm always on time, like Ja Rule and Ashanti, I picked Honey Boo Boo. Yes, I have a calendar.
Pin It
Tuesday, October 14, 2014
Allure Insiders Get The Look: Ariel Halloween Makeup Edition
It's almost Halloween up in here (up in here)! That's my ride-or-die favorite time of year, and to kick off ye olde costume season, I did a little tutorial for The Little Mermaid for my latest "Get the Look" Allure Insiders video.
I might have even attempted my own Ariel-esque hair flip in this video. You'll have to watch and find out how that turned out, although I'm sure that you can deduce the outcome, you little Sherlock Holmes.
Happy (almost) Halloween!
Pin It
Tuesday, August 5, 2014
Allure Insiders Get The Look: Megan Fox's April O'Neil In Teenage Mutant Ninja Turtles Tutorial

It's almost time for the re-vamped version of Teenage Mutant Ninja Turtles (ugh, I'm such a Michelangelo), so I decided a tutorial on Megan Fox's April O'Neil look for this week's Allure Insiders video. Heroes in a half shell, TURTLE POWER, and whatnot.
Check it out, and you can find all of my Allure Insiders videos here, if you just really can't get enough of my melodic voice and dreamy ass mug.
Pin It
Tuesday, July 29, 2014
Mug Makeover: Clueless (Cher Horowitz) Edition

I blame the friggin' "Fancy" video. For everything, really, but especially for re-resurrecting (yep, not a word) my Cher Horowitz beauty infatuation. I even wrote about this bangin' cinematic moment briefly in this Allure post, but that couldn't satiate my Clueless hunger.

So I decided that I really had no choice but to do a Mug Makeover for my favorite CH moment. Bonus points for the fact that it's super-easy to duplicate.
P.S. CLUELESS IS ON MF-ING NETFLIX, YOU GUYS, GET EXCITED.

The first step is to apply a nude/light brown matte eyeshadow to your lids. I used "Naked" from Urban Decay.

Next you'll want to line your upper waterline with a waterproof black liner (I used UD 24/7 Eye Pencil in "Zero") to make you look like you've got one billion lashes without mimicking Taylor Momsen's eyeliner habit. Because this eyeball look is trés natural, we're swapping out the black liner for brown (like MUFE Aqua Eyes liner in "Matte Brown") when it comes to lining your upper lid. Let the bottom lid go completely sans liner, then mascara away. I only did one coat (and a half), because Cher's makeup isn't very lash-centric.

For brows, I only defined the tail with Anastasia Dipbrow Pomade in "Dark Brown." I also tried to make my brows a slightly straighter shape because, doy, that's what Cher has going on.

Throw on some bright pink blush (like MAC Blush in "Dollymix"). Go for something bright and girly with the world's tiniest touch of shimmer. TINIEST.

Finish your face with a solid nude lip. I started with a matte lipstick (Wet n Wild MegaLast in "Bare it All"), then topped it of with a shiny nude 'stick (L'Oreal Colour Riche Caress Stick in "Sheer Linen"). The idea is to have a decent amount of lip color with a touch of shine.

Okay, your face is done and you're a total Betty, but now let's tackle that mop. Start by straightening your hair, turning it under at the ends like you're doing "the Rachel" -- the later years. Then pull your hair into a really high ponytail, but don't make it too tight and pull it slightly to one side.
Grab a pen (or rat tail comb, if you're fancy), and pull out the section of hair close to your forehead a little. Then pull out some of the hairs around your face to make it grown and sexy. And messy.
If your pony needs a little more oomph, you can put a clip inside the back of your 'tail. It's like a little hair bra. You know -- it supports that shit and pushes it up.

That's the end! Your you-to-Clue(less) Mug Makeover is complete. Enjoy your new life as a rich, 90s, Beverly Hills teenager. I'll just be over here going about my life trying to not be a full-on Monet.
P.P.S. Why did this electronic Fashion Plates fabulous-ity never become a thing? You're boring, technology.

Pin It
Wednesday, July 16, 2014
Mug Makeover: Teen Witch Edition
There are very few things that are important to me in life. I'm usually a "give zero effs" kind of gal (bleh), but that does not hold true when it comes to one of my favorite movies of all friggin' time -- Teen Witch.

If you can't get down with an 80s movie that involves witchcraft and chicanery for popularity's sake, heavy use of tutus and denim jackets, and delightfully awkward rapping, then I don't have time for your silly nonsense. So when I tell you that I have created a Teen Witch beauty tutorial, your ass should not be surprised.
And without further dramatics, I present to you my most meaningful beauty look that I have ever created. Sadly, it's not the old lady witch that was also in Poltergeist. Maybe next time.

I would recommend using a sturdy-ass, Aqua Net-esque hairspray if you want your hair to stay. I just used texturizing spray because I wasn't trying to be hard-haired and authentically 80s, so, whatever. Choose your own hair adventure.

You can totally use an eyeshadow as a brow powder. Just please, for the love of Yeezus, CHOOSE A DAMN MATTE SHADOW.

Use whatever neutral eyeshadow you've got hanging around for this part. I prefer to do shimmery on the lid and matte on the crease, but do what your heart tells you to. Especially if you're a young buck. Your eyelids still have years sans-crepe, so play on, playa.
 If you're oily, go for a gel liner or a long-wear liner, or you WILL look a hot mess in 13.5 minutes.


Use whichever gloss or 'stick you're into, just keep it in the coral or peach tones. I think that that's the theme of the day -- do whatever the hell you want. Kind of.

Okay, all done! My hair's not AS 80s as real Louise's, but you get the vibe. Do you guys love Tee Dubs as much as I do? Does anyone even know what I'm talking about right now?

Supersonic, idiotic, disconnecting, not respecting, who would really ever wanna go and top that?!?
Pin It
If you can't get down with an 80s movie that involves witchcraft and chicanery for popularity's sake, heavy use of tutus and denim jackets, and delightfully awkward rapping, then I don't have time for your silly nonsense. So when I tell you that I have created a Teen Witch beauty tutorial, your ass should not be surprised.
And without further dramatics, I present to you my most meaningful beauty look that I have ever created. Sadly, it's not the old lady witch that was also in Poltergeist. Maybe next time.
I would recommend using a sturdy-ass, Aqua Net-esque hairspray if you want your hair to stay. I just used texturizing spray because I wasn't trying to be hard-haired and authentically 80s, so, whatever. Choose your own hair adventure.
You can totally use an eyeshadow as a brow powder. Just please, for the love of Yeezus, CHOOSE A DAMN MATTE SHADOW.
Use whatever neutral eyeshadow you've got hanging around for this part. I prefer to do shimmery on the lid and matte on the crease, but do what your heart tells you to. Especially if you're a young buck. Your eyelids still have years sans-crepe, so play on, playa.
Use whichever gloss or 'stick you're into, just keep it in the coral or peach tones. I think that that's the theme of the day -- do whatever the hell you want. Kind of.
Okay, all done! My hair's not AS 80s as real Louise's, but you get the vibe. Do you guys love Tee Dubs as much as I do? Does anyone even know what I'm talking about right now?
Supersonic, idiotic, disconnecting, not respecting, who would really ever wanna go and top that?!?
Pin It
Saturday, June 28, 2014
Mug Makeover: Gwen Stefani Edition
The other day I was reading this article over at Refinery29, and came across this bomb picture of Gwen Stefani. It was like watching Jonathan Brandis (RIP) in Ladybugs** -- I fell in love all over again. GS is usually looking consistently fly, so it's not like I expected anything different from her ass, but I feel like this makeup look is slightly different from her regular deal and I wanted that shit on my face immediately.
I've recreated it below in a few easy steps, so read on, reader, if you
want Gwennie's glorious face on your face. (Without getting all Buffalo Bill-y
and illegal.)
P.S. I would (almost but not quite) literally kill for that kimono.
I started with the eyes, which are really pretty simple and low key, with a touch of shimmer. (But NOT glitter, the nemesis of soul windows everywhere.) I'm using the Lorac Starry-Eyed Baked Eye Shadow Trio in Pro Star, which I can't friggin' find anywhere, but this Superstar palette ($27) is super-similar.

Start by applying a shimmery brown shadow from the crease to the lash line.

Follow up by using a light bronze-y eyeshadow in the crease and also on the bottom lash line.

Next apply some black liner on the upper lash line only. I'm pretty ride-or-die liquid liner in this situation, but live your life and use whatever eyeliner you like. I used the Marc Jacobs Magic Marc'er Precision Pen Waterproof Eyeliner ($30) because I LOVE THAT SHIT.

Finish off with a powerful mascara, because Gwen's lashes be bangin' in this face case. I'm using Rimmel Scandaleyes Rockin' Curves Mascara ($6.99), that CVS Beauty Club so kindly sent me to sample, along with the Rimmel lipstick that I use in a hot minute. The mascara is actually pretty boss. It makes my lashes seem as long as a Real Housewives Reunion show, parts one through seven, but 309485% less boring.

For lips, I started by lining with MAKE UP FOR EVER Aqua Lip Waterproof Lipliner Pencil in Bright Baby Pink ($19), because it's just what I happened to have lying around. Once again, use what you wish, but definitely use a liner with a bright lip like this to prevent that rude bitch, lipstick feathering.

The last step is to throw on a bright reddish-pink lipstick, like Rimmel Moisture Renew Lipstick in As You Want Victoria ($6.99). I really enjoy the shade of this 'stick, but I had to get used to the moisturizing aspect. I'm usually more of a matte lip kind of mofo, so I had to do some reapplying as the hours ticked by. But the formula feels like a dream, so it's worth the extra seconds of reapply time.

That's it, here's the finished product. I might not look as much like a flawless creamy-skinned elf as Gwen, but I'm completely into this face.

What do you guys think? Are you into Mizz Gwen's look? You don't even know how hard I had to fight against making a "Hella Good" reference here, so tell your brains "you're welcome" for the reprieve from my typical terrible puns.
** I used to carry around a folded-up pictures of Jonathan Brandis in my pocket in Elementary school. I was an avid reader of Tiger Beat, Big Bopper, et al, and I would rip out pictures of JB and carry them until they pretty much deteriorated into ransom-letter-like scraps.
Pin It
 |
| pic via refinery29 |
P.S. I would (almost but not quite) literally kill for that kimono.
I started with the eyes, which are really pretty simple and low key, with a touch of shimmer. (But NOT glitter, the nemesis of soul windows everywhere.) I'm using the Lorac Starry-Eyed Baked Eye Shadow Trio in Pro Star, which I can't friggin' find anywhere, but this Superstar palette ($27) is super-similar.
Start by applying a shimmery brown shadow from the crease to the lash line.
Follow up by using a light bronze-y eyeshadow in the crease and also on the bottom lash line.
Next apply some black liner on the upper lash line only. I'm pretty ride-or-die liquid liner in this situation, but live your life and use whatever eyeliner you like. I used the Marc Jacobs Magic Marc'er Precision Pen Waterproof Eyeliner ($30) because I LOVE THAT SHIT.
Finish off with a powerful mascara, because Gwen's lashes be bangin' in this face case. I'm using Rimmel Scandaleyes Rockin' Curves Mascara ($6.99), that CVS Beauty Club so kindly sent me to sample, along with the Rimmel lipstick that I use in a hot minute. The mascara is actually pretty boss. It makes my lashes seem as long as a Real Housewives Reunion show, parts one through seven, but 309485% less boring.
For lips, I started by lining with MAKE UP FOR EVER Aqua Lip Waterproof Lipliner Pencil in Bright Baby Pink ($19), because it's just what I happened to have lying around. Once again, use what you wish, but definitely use a liner with a bright lip like this to prevent that rude bitch, lipstick feathering.
The last step is to throw on a bright reddish-pink lipstick, like Rimmel Moisture Renew Lipstick in As You Want Victoria ($6.99). I really enjoy the shade of this 'stick, but I had to get used to the moisturizing aspect. I'm usually more of a matte lip kind of mofo, so I had to do some reapplying as the hours ticked by. But the formula feels like a dream, so it's worth the extra seconds of reapply time.
That's it, here's the finished product. I might not look as much like a flawless creamy-skinned elf as Gwen, but I'm completely into this face.
What do you guys think? Are you into Mizz Gwen's look? You don't even know how hard I had to fight against making a "Hella Good" reference here, so tell your brains "you're welcome" for the reprieve from my typical terrible puns.
** I used to carry around a folded-up pictures of Jonathan Brandis in my pocket in Elementary school. I was an avid reader of Tiger Beat, Big Bopper, et al, and I would rip out pictures of JB and carry them until they pretty much deteriorated into ransom-letter-like scraps.
Pin It
Tuesday, June 10, 2014
Allure Insiders Get The Look: Orange Is The New Black Makeover Mashup
The subject of this week's Allure Insiders video is one of my favorites (uh, doy). I took three of my favorite characters from my beloved OITNB and created a mashup look from little pieces of all of them. Watch on to see who I chose.
And if you aren't caught up on the show, what the eff are you waiting on? Head over to Netflix and binge-watch the hell of it like any sane person would, then come back over hear and lets talk about it! (I finished this weekend, obviously.)

P.S. If you don't want to "boop" Suzanne, I don't even know you.
Pin It
Tuesday, May 27, 2014
Allure Insiders Get The Look: Mariah Carey "Honey" Tutorial
MY FIRST ALLURE INSIDERS VIDEO IS OUT, YOU GUYS. This one is near and dear to my heart because it's all about Mariah Carey. But not now-times Mariah, I'm all about MC in the "Honey" video. It's one of my favorites because it combines so many incredible things: Kangol hats, jet skis, zip-up swimwear and clip-on ponytails. So, check it out and see what you think.
I'll be coming out with a new video every other Tuesday, so I'll post them here if you feel like perusing the goodies.
P.S. I've been out of town for the past several days, so I'll get back to the reg when I get back into town tomorrow night. Sorry for being a crap-ster, part 23984039284.
Pin It
Monday, April 21, 2014
Build-A-Brow Workshop: For Next Level Eyebrows

Hey, have we met? If so, I'm sure you've heard the good word: I'm completely friggin' eyebrow obsessed. Eyebrows are the reason that I started this blog. Eyebrows are the reason that I get out of bed some days. I don't leave the house sans brows of some sort, ever. I pity the fool that has to see my sad sack face without them.
This annoying ass character flaw is a complete detriment to my psyche, but it is somewhat beneficial. Because of my whack, over-the-top eyebrow compulsion, I have tried tons of brow products and techniques and whittled them down to a refined non-art. Whether you prefer your brows to be fresh-to-death natural or bold and slapping mofo's eyeballs out, I've got you covered. Soup to nuts. (WHAT DOES THAT EVEN MEAN?)
The Natural

If this is your brow style, you are probably fresh-faced and low maintenance. I wish I was you. Even if you're one of those "I don't really wear that much on muh face" ladies, your eyebrows need a little love 'n' such. Brow gels are right up your au nautrale alley, honey.

I really love Anastasia's Brow Gel, but I've used everything from CoverGirl clear mascara to spraying hairspray on a clean mascara wand. It's your damn life, live it how you choose. The real key here is how you apply whatever you're using. You want to brush your eyebrows up first, then over toward the end of your brow. THAT'S IT, MAYNE.
This will give you just enough natural polish to your brow game, without any color or fuss. Play on, natural playa.
The Lazy Bold Bitch

This next tier of brows is my everyday shit. It gives me plenty of boldness and hold, all in one little baby boo faced product, which is really in tune with my lazy sensibilities. This is for you if you want bangin' brows, but don't feel like completing 49850238409 steps to attain them.

This brow look is all about the Anastasia Dipbrow Pomade, which is apparently sold out everywhere, but cop it when it comes back. It's magic. It's easy to go overboard (like my favorite Goldie Hawn movie) with this stuff, so there's a method to perfection.
Instead of starting to outline your eyebrows at the start of the brows, begin at the inner bottom of the arch and follow all the way to the tail. Do the same at the top line of the brows, starting a little ways back, then fill in the whole tail end of the brows. Think of it almost like your eyebrows are an ombre dye job. Keep the darker stuff at the ends and use a lighter hand at the front. So with that in mind, fill in the front eyebrow area with just what's left on your brush after you've done the rest, to keep it natural, natch.
The Veruca Salt

If you want to use every brow product that has ever been created in a lab and also have peeps dogging you on the street for your eyebrow secrets, like you're in some brow-centric music video, this is bud's for you. The VS brow is my "I'm trying" eyebrow go-to because, well, it takes actual effort, which is a lot for me.

To start this whirlwind, line your eyebrow starting at the very inner point closest to your nose, using a light-colored pencil, and outline the bottom line of your brow. Repeat the same deal on the top, again starting at the very inner top point. Now fill in the back tail of the brow with a darker shadow or brow powder. Next, shade in the front area with a lighter powder, which will smudge and disguise the lines you've drawn, and avoid eyebrows that could slice a b. Finish up with brow gel.
Voila, the boldest brow on the street. Veruca Salt would shove her red drop waist dress in a paper shredder to get next to your eyebrows, just so she could get them now.
Pin It
Monday, January 6, 2014
What's The Haps, Naked3 Palette? Plus, A Head-To-Head Smackdown Between Naked3 And the Original Naked Palette.
I finally stopped being lazy for 3.5 seconds, put my grown lady panties on, and made a video about Urban Decay's Naked3 palette. Give it a watch to see what gets me all hot and bothered (gross) about it, as well as how it stacks up against the original Naked. Now, LET'S GET NAKEY (X 3)!
By the way, here's a closer look at N3, if you're so inclined to see that sh*t up close and personal like:


You can pick up Naked3 here, or if original Naked is more your cup o' tea, check it here.
Pin It
By the way, here's a closer look at N3, if you're so inclined to see that sh*t up close and personal like:
You can pick up Naked3 here, or if original Naked is more your cup o' tea, check it here.
Pin It
Friday, November 22, 2013
Get Yo' Fiery Eyes On With This "Catching Fire" Inspired Makeup Tutorial

If you feel like getting them eyeballs to "Catch Fire," watch the Hunger Games-inspired tutorial below.
Pin It
Wednesday, July 10, 2013
Trash Box Nail Tutorials: Glitter Sand Art Edition
Did you guys ever have on of these sand/glitter deals as a kid?

You would flip it over, and then the sand/glitter mixture would move around and make another boring formation. It was one of those things that was half cool to look at and half thing that your parents bought to shut you up.
Well, today's nail idea is based on these boringly badass art memorabilia.

SOMEWHAT similar, right? Oh, who the eff knows. I literally made this sh*t up five minutes ago. If you happen to want to try this quasi-nail art look yourself, here's what you'll need.

Three glittery nail polishes. I chose Dimepiece and Stun from Floss Gloss, because I effing love the kids, and Follow Me on Glitter from Nicole by OPI from the Kardashian Kollection because I really, really hate myself. Let us never speak of me buying anything Kardashian-related ever again, mmmmkay?
Here's what you do:

Step One -- Paint on the first color about halfway up your nail.
Step Two -- (There's so much we can do. P.S. If you don't click on that link and watch it in its entirety, I hate you.) Paint the second color slightly overlapping the first, and almost to the tip of your nail.
Step Three -- Take the third color, overlap a little with color two, and to the end of the nail.
Step Four -- Take color number one and blur the edges between the first two colors, so it's not a straight, blah ass border between. DONE!
The best way to get an opaque glitter look with one shot with this sh*t is to lay the brush flat on your nail and glob it on. This is a textured look, so you don't want it to be perfect. Go ahead, eff it up a little.
Easiest. Nail. (Kinda) art. EVA.
Pin It
Subscribe to:
Comments
(
Atom
)