 |
Showing posts with label Makeup. Show all posts
Showing posts with label Makeup. Show all posts
Tuesday, October 14, 2014
Allure Insiders Get The Look: Ariel Halloween Makeup Edition
It's almost Halloween up in here (up in here)! That's my ride-or-die favorite time of year, and to kick off ye olde costume season, I did a little tutorial for The Little Mermaid for my latest "Get the Look" Allure Insiders video.
I might have even attempted my own Ariel-esque hair flip in this video. You'll have to watch and find out how that turned out, although I'm sure that you can deduce the outcome, you little Sherlock Holmes.
Happy (almost) Halloween!
Pin It
Monday, August 4, 2014
How To Make Your Foundation Work To Its Fullest On Non-Perfect Skin
Hey, have you heard? I have nightmarish-to-night terrorish skin. I know, I know -- my life is a dream. The upswing of my face having a permanent residence on Shitty Skin Avenue? I have learned many a tip on how to camouflage (as much as possible) a plethora of skin issues including: enlarged pores, acne scars, live-action (even cystic) acne, and discoloration of every type.

When it comes to covering not-so-great skin, you pretty much have to take mad extra steps and go balls to the wall when it comes to coverage. This ain't your best friend's sister's perfect-skinned cousin's "throw on some BB Cream and call it a day" foundation routine. This mess is INVOLVED. So maybe this is more of a "going out" type deal for you. Maybe it's an "everyday" type deal for you (ahem, me). Hey, I don't know your life.
Sit back, grab some snacks and let's delve into this novel that I call my foundation routine.

I know that a lot of you out there aren't priming your mug pre-foundation, but I promise your ass that it makes a difference in both the smoothness of application and staying power of your face paints. There are a dumpster-load of options when it comes to the type of primer you can choose, but I've found the best kind for each skin-type because MY SKIN HAS BEEN ALL THINGS. This is my real and actual life.
Oily Skin: I have used this primer method on and off for years and years, although it's a smidge unconventional. I'm talking using a powder as primer for oily skin. I know this sounds weird as eff, but when I lived in so-humid-you-want-to-cry-then-die Florida, this worked really well for me because my skin was BEYOND CRAZY OILY. I've also found it to work way better than f'real primers for oily skin, which usual end up giving you splotchy and unfortunate foundation situations.
Here's what you do -- apply a powder (translucent if you want less coverage, powder with actual color if you want more) to your face with a fluffy brush before you apply your liquid foundation. That's it. If you have places on your face that have heavy discoloration/need a ton of covering, use a sponge to add more product to those specific areas. This method can have a tendency for more cake-faced instances if you get like Goldie Hawn and go overboard, so just don't get too, too crazy with it.
Normal Skin: Normal skin can really get away with just about anything, but I have really been enamored as eff with the easiness and lightness of Skindinavia's Primer Spray ($35). I've already reviewed this, so I'll keep this shit short. It still does a great jobby job of priming, but feels zero percent gross on your mug. But instead of spritzing it directly on my face, I've taken to doing two sprays into my palm and applying it to my face with my hands. That way I'm in control, like Janet Jackson in this b.
Dry Skin: If you have dry skin, primer is a great way to give your face extra smoothness and to seal in moisture. I wanted to tell you about how much I love the Victoria's Secret Primer above, but they discontinued it, so bump that, I guess. Whatever, use a damn primer. You'll love your foundation way more, I promise.
Bonus Tip: If large pores are an issue for you, use a pore-minimizing balm like Benefit POREfessional ($31) to minimize those mofos after applying your primer of choice. (Unless you're doing the powder primer method. In that case, do it before.)

So this shit ain't rocket science -- if you want more coverage on your problematic skin, choose a fuller coverage foundation. My foundation trial portfolio is strong-to-quite strong, so I can help you narrow down the craziness.
Oily skin should choose a liquid foundation with a matte finish. My favorites are Rimmel Stay Matte Liquid Mousse ($5.49-ish) for drugstore brands, and Kat Von D Lock-It Tattoo Foundation ($34) for higher-end stuffs. They both stay on forever ever (especially the KVD) and will help tell your oil glands to calm their tits for once.
Drier-skinned peeps can lean more toward the likes of Laura Mercier Silk Creme Foundation ($45), which I LOVE, and DERMABLEND Smooth Indulgence Foundation ($32). You really can't miss with any of these foundations. They all fall into the dope to bomb categories.

Picking a bangin' foundation isn't the only key to the flawless-ish faced kingdom. How you apply said foundation is also très important.
I love the damn Beauty Blender ($19.95). I've probably talked about this baby before, but I just can't be held responsible for my repetitions. It's great for blending (doy) foundation, and leaves your skin with a great finish. But for times when I want more foundation with my foundation, I prefer using my IT Cosmetics Flat Top Buffing Foundation Brush ($48). This thing is expensive, but it's a bad b. It allows for fuller, yet super-even coverage.

After foundation times have come upon your face it's time to conceal. You might have to work on that under-eye area, or maybe you still have some blemishes and whatnot to cover. My favorites for these jobs are Sonia Kashuk Hidden Agenda Concealer Palette ($10.49) for drugstore, and Amazing Cosmetics Concealer ($42) for that spendy spendy. I like to apply either with a fingertip, because the body heat from skin really blends the concealer. (That was an overtly sexual-sounding sentence. Avert your eyes, minors.)

The time has come to powder your nose (and everything else). Once again, you have a few different paths you can choose, depending on the level of coverage you require. If you don't need any more, just brush on a translucent powder. NARS Light Reflecting Loose Setting Powder ($35) is my favorite, but do your thang with whatever.
If you want a touch more coverage, go for a lighter mineral powder like Everyday Minerals Semi-Matte Base ($14). It's not completely matte, so you won't have a crazy plastic android face.
I, on the other hand, want coverage that rivals the Phantom of the Opera's mask, so I'm obsessed with Kat Von D Lock-It Powder Foundation ($34) for topping off my foundation. Just make sure to apply it with a fluffy brush and not a sponge, or your mug will definitely be filed under "too friggin' much, dude."

Bonus Tip: If you suffer from uneven skin texture (that's me to the extreme, baby), avoid overly sparkly face stuffs. It draws more attention to imperfections. Trust.

Pshew, we're almost done. If you're still here, you're a ride-or-die homie. The very final step is to keep your shit in check with a setting spray. This helps your makeup last all day (especially in gross heat/humidity), and will also eliminate any George Washington's wig-like powdery look to your face.
My oily-skinned sisters, when it comes to picking a setting spray you're best off picking either Urban Decay's De-Slick ($30) or Model in a Bottle OG formula ($18), which is my favoritest favorite. If you're more on the dry side, Model in a Bottle also makes a Sensitive Skin Formula ($21) that won't leave you completely parched.
Okay, okay, I'm done with my foundation yammering. I can't take any more of this.

I need to take several seats followed by twenty-nine naps. At least all of your faces will look like MF-ing perfection. I can rest easy in that.
Pin It
When it comes to covering not-so-great skin, you pretty much have to take mad extra steps and go balls to the wall when it comes to coverage. This ain't your best friend's sister's perfect-skinned cousin's "throw on some BB Cream and call it a day" foundation routine. This mess is INVOLVED. So maybe this is more of a "going out" type deal for you. Maybe it's an "everyday" type deal for you (ahem, me). Hey, I don't know your life.
Sit back, grab some snacks and let's delve into this novel that I call my foundation routine.
Choose Your Primer Adventure
I know that a lot of you out there aren't priming your mug pre-foundation, but I promise your ass that it makes a difference in both the smoothness of application and staying power of your face paints. There are a dumpster-load of options when it comes to the type of primer you can choose, but I've found the best kind for each skin-type because MY SKIN HAS BEEN ALL THINGS. This is my real and actual life.
Oily Skin: I have used this primer method on and off for years and years, although it's a smidge unconventional. I'm talking using a powder as primer for oily skin. I know this sounds weird as eff, but when I lived in so-humid-you-want-to-cry-then-die Florida, this worked really well for me because my skin was BEYOND CRAZY OILY. I've also found it to work way better than f'real primers for oily skin, which usual end up giving you splotchy and unfortunate foundation situations.
Here's what you do -- apply a powder (translucent if you want less coverage, powder with actual color if you want more) to your face with a fluffy brush before you apply your liquid foundation. That's it. If you have places on your face that have heavy discoloration/need a ton of covering, use a sponge to add more product to those specific areas. This method can have a tendency for more cake-faced instances if you get like Goldie Hawn and go overboard, so just don't get too, too crazy with it.
Normal Skin: Normal skin can really get away with just about anything, but I have really been enamored as eff with the easiness and lightness of Skindinavia's Primer Spray ($35). I've already reviewed this, so I'll keep this shit short. It still does a great jobby job of priming, but feels zero percent gross on your mug. But instead of spritzing it directly on my face, I've taken to doing two sprays into my palm and applying it to my face with my hands. That way I'm in control, like Janet Jackson in this b.
Dry Skin: If you have dry skin, primer is a great way to give your face extra smoothness and to seal in moisture. I wanted to tell you about how much I love the Victoria's Secret Primer above, but they discontinued it, so bump that, I guess. Whatever, use a damn primer. You'll love your foundation way more, I promise.
Bonus Tip: If large pores are an issue for you, use a pore-minimizing balm like Benefit POREfessional ($31) to minimize those mofos after applying your primer of choice. (Unless you're doing the powder primer method. In that case, do it before.)
Cover All The Bases
So this shit ain't rocket science -- if you want more coverage on your problematic skin, choose a fuller coverage foundation. My foundation trial portfolio is strong-to-quite strong, so I can help you narrow down the craziness.
Oily skin should choose a liquid foundation with a matte finish. My favorites are Rimmel Stay Matte Liquid Mousse ($5.49-ish) for drugstore brands, and Kat Von D Lock-It Tattoo Foundation ($34) for higher-end stuffs. They both stay on forever ever (especially the KVD) and will help tell your oil glands to calm their tits for once.
Drier-skinned peeps can lean more toward the likes of Laura Mercier Silk Creme Foundation ($45), which I LOVE, and DERMABLEND Smooth Indulgence Foundation ($32). You really can't miss with any of these foundations. They all fall into the dope to bomb categories.
The Application Game
Picking a bangin' foundation isn't the only key to the flawless-ish faced kingdom. How you apply said foundation is also très important.
I love the damn Beauty Blender ($19.95). I've probably talked about this baby before, but I just can't be held responsible for my repetitions. It's great for blending (doy) foundation, and leaves your skin with a great finish. But for times when I want more foundation with my foundation, I prefer using my IT Cosmetics Flat Top Buffing Foundation Brush ($48). This thing is expensive, but it's a bad b. It allows for fuller, yet super-even coverage.
Conceal Your Deal
After foundation times have come upon your face it's time to conceal. You might have to work on that under-eye area, or maybe you still have some blemishes and whatnot to cover. My favorites for these jobs are Sonia Kashuk Hidden Agenda Concealer Palette ($10.49) for drugstore, and Amazing Cosmetics Concealer ($42) for that spendy spendy. I like to apply either with a fingertip, because the body heat from skin really blends the concealer. (That was an overtly sexual-sounding sentence. Avert your eyes, minors.)
Stop...Powder Time!
The time has come to powder your nose (and everything else). Once again, you have a few different paths you can choose, depending on the level of coverage you require. If you don't need any more, just brush on a translucent powder. NARS Light Reflecting Loose Setting Powder ($35) is my favorite, but do your thang with whatever.
If you want a touch more coverage, go for a lighter mineral powder like Everyday Minerals Semi-Matte Base ($14). It's not completely matte, so you won't have a crazy plastic android face.
I, on the other hand, want coverage that rivals the Phantom of the Opera's mask, so I'm obsessed with Kat Von D Lock-It Powder Foundation ($34) for topping off my foundation. Just make sure to apply it with a fluffy brush and not a sponge, or your mug will definitely be filed under "too friggin' much, dude."
Bonus Tip: If you suffer from uneven skin texture (that's me to the extreme, baby), avoid overly sparkly face stuffs. It draws more attention to imperfections. Trust.
Spray To Stay
Pshew, we're almost done. If you're still here, you're a ride-or-die homie. The very final step is to keep your shit in check with a setting spray. This helps your makeup last all day (especially in gross heat/humidity), and will also eliminate any George Washington's wig-like powdery look to your face.
My oily-skinned sisters, when it comes to picking a setting spray you're best off picking either Urban Decay's De-Slick ($30) or Model in a Bottle OG formula ($18), which is my favoritest favorite. If you're more on the dry side, Model in a Bottle also makes a Sensitive Skin Formula ($21) that won't leave you completely parched.
Okay, okay, I'm done with my foundation yammering. I can't take any more of this.
I need to take several seats followed by twenty-nine naps. At least all of your faces will look like MF-ing perfection. I can rest easy in that.
Pin It
Wednesday, July 30, 2014
Drugstore Darlings: Let's Check Out The Maybelline The Nudes Palette
Gather around for a very important storytime, kids. There was once a lady that loved makeup a little too much for her own good. And sometimes when a person really, really wants to find a palette that they think they'll love on their eyeball lids, they will drive to eight friggin' different drugstores to find said palette. Especially when the palette seems super-affordable and dreamy. And when the lady was united with the palette, she was happy.

THE END. JK! That's just the beginning. And I'm a horrible storyteller. And it's probably slightly inappropriate to tell kids a story about anything called "The Nudes." Keep the youths away from me.

I was pretty damn excited about finally copping this palette. I actually got it for about $7, because Walgreens was having some sort of Maybelline sale. I can't be bothered with the details, because I was on a "GOTCHA B!" high, but I think it typically retails for $12-ish in drugstores.

Here's a close-up look at the shadows and swatches of all of the colors. The eyeshadows are almost evenly split between matte and shimmery finishes, which is a pretty bomb and refreshing find. AIN'T NOBODY THAT WANTS ALL SHIMMERY SHADOW PALETTES, COSMETIC COMPANIES. STOP THE INSANITY.
The matte colors (with the exception of the base/highlight shade) would also all be perfect doubling as brow powders, which is always a nice bonus.
I decided to do a mini head-to-head challenge pitting The Nudes against Urban Decay's OG Naked Palette. The color schemes are pretty similar, so I devoted one eyeball to each palette, and used my wee wee brain (and a camera) to document the differences. (Side note: Please ignore my scaly ass eyelid. I'm using a new skin treatment, and it wants my skin to be dry like whoa.)


I tried to pick similar colors in both palettes to create an as-close-to-identical eye as possible. The verdict? Crazy close, non?
There are a few major differences that I noticed between the two palettes. The spendy ass UD shadows are a lot softer and more blend-y, but almost to a fault. As you can see on the UD lid, the shadows almost blend together a little TOO well, if you know what I'm sayin'. On the other hand, the Maybelline shadows are pretty chalky in texture, but the colors almost seem richer than their more expensive comrades. (The exception were with the lighter/highlighting shades. Those weren't very vibrant. At all.)
Bottom line -- I'm not going to blow smoke up ye olde bung-hole and say, "OWROWIQRJF IT'S JUST LIKE A ONE BILLION DOLLAR PALETTE! WHEEEE!" But, it's really damn great for drugstore eyeshadows. And in some ways it's even better. It's definitely worth them handful of bones, for serious.

So now you can feel free to spend your cash flow on country clubs, strip clubs, or wherever you want, ya' freak bitch!
Pin It
THE END. JK! That's just the beginning. And I'm a horrible storyteller. And it's probably slightly inappropriate to tell kids a story about anything called "The Nudes." Keep the youths away from me.
I was pretty damn excited about finally copping this palette. I actually got it for about $7, because Walgreens was having some sort of Maybelline sale. I can't be bothered with the details, because I was on a "GOTCHA B!" high, but I think it typically retails for $12-ish in drugstores.
Here's a close-up look at the shadows and swatches of all of the colors. The eyeshadows are almost evenly split between matte and shimmery finishes, which is a pretty bomb and refreshing find. AIN'T NOBODY THAT WANTS ALL SHIMMERY SHADOW PALETTES, COSMETIC COMPANIES. STOP THE INSANITY.
The matte colors (with the exception of the base/highlight shade) would also all be perfect doubling as brow powders, which is always a nice bonus.
I decided to do a mini head-to-head challenge pitting The Nudes against Urban Decay's OG Naked Palette. The color schemes are pretty similar, so I devoted one eyeball to each palette, and used my wee wee brain (and a camera) to document the differences. (Side note: Please ignore my scaly ass eyelid. I'm using a new skin treatment, and it wants my skin to be dry like whoa.)
I tried to pick similar colors in both palettes to create an as-close-to-identical eye as possible. The verdict? Crazy close, non?
There are a few major differences that I noticed between the two palettes. The spendy ass UD shadows are a lot softer and more blend-y, but almost to a fault. As you can see on the UD lid, the shadows almost blend together a little TOO well, if you know what I'm sayin'. On the other hand, the Maybelline shadows are pretty chalky in texture, but the colors almost seem richer than their more expensive comrades. (The exception were with the lighter/highlighting shades. Those weren't very vibrant. At all.)
Bottom line -- I'm not going to blow smoke up ye olde bung-hole and say, "OWROWIQRJF IT'S JUST LIKE A ONE BILLION DOLLAR PALETTE! WHEEEE!" But, it's really damn great for drugstore eyeshadows. And in some ways it's even better. It's definitely worth them handful of bones, for serious.
So now you can feel free to spend your cash flow on country clubs, strip clubs, or wherever you want, ya' freak bitch!
Pin It
Tuesday, July 29, 2014
Mug Makeover: Clueless (Cher Horowitz) Edition

I blame the friggin' "Fancy" video. For everything, really, but especially for re-resurrecting (yep, not a word) my Cher Horowitz beauty infatuation. I even wrote about this bangin' cinematic moment briefly in this Allure post, but that couldn't satiate my Clueless hunger.

So I decided that I really had no choice but to do a Mug Makeover for my favorite CH moment. Bonus points for the fact that it's super-easy to duplicate.
P.S. CLUELESS IS ON MF-ING NETFLIX, YOU GUYS, GET EXCITED.

The first step is to apply a nude/light brown matte eyeshadow to your lids. I used "Naked" from Urban Decay.

Next you'll want to line your upper waterline with a waterproof black liner (I used UD 24/7 Eye Pencil in "Zero") to make you look like you've got one billion lashes without mimicking Taylor Momsen's eyeliner habit. Because this eyeball look is trés natural, we're swapping out the black liner for brown (like MUFE Aqua Eyes liner in "Matte Brown") when it comes to lining your upper lid. Let the bottom lid go completely sans liner, then mascara away. I only did one coat (and a half), because Cher's makeup isn't very lash-centric.

For brows, I only defined the tail with Anastasia Dipbrow Pomade in "Dark Brown." I also tried to make my brows a slightly straighter shape because, doy, that's what Cher has going on.

Throw on some bright pink blush (like MAC Blush in "Dollymix"). Go for something bright and girly with the world's tiniest touch of shimmer. TINIEST.

Finish your face with a solid nude lip. I started with a matte lipstick (Wet n Wild MegaLast in "Bare it All"), then topped it of with a shiny nude 'stick (L'Oreal Colour Riche Caress Stick in "Sheer Linen"). The idea is to have a decent amount of lip color with a touch of shine.

Okay, your face is done and you're a total Betty, but now let's tackle that mop. Start by straightening your hair, turning it under at the ends like you're doing "the Rachel" -- the later years. Then pull your hair into a really high ponytail, but don't make it too tight and pull it slightly to one side.
Grab a pen (or rat tail comb, if you're fancy), and pull out the section of hair close to your forehead a little. Then pull out some of the hairs around your face to make it grown and sexy. And messy.
If your pony needs a little more oomph, you can put a clip inside the back of your 'tail. It's like a little hair bra. You know -- it supports that shit and pushes it up.

That's the end! Your you-to-Clue(less) Mug Makeover is complete. Enjoy your new life as a rich, 90s, Beverly Hills teenager. I'll just be over here going about my life trying to not be a full-on Monet.
P.P.S. Why did this electronic Fashion Plates fabulous-ity never become a thing? You're boring, technology.

Pin It
Wednesday, July 23, 2014
Drugstore Beauty Haul (With A Dash Of Sephora)
I kind of bought a lot of shit last week, so I decided to make a haul video, even though I kind of hate them. So here's nine minutes of your time that you'll never get back, but check it out if you want to see all of the craps that I bought. If not, that's cool.

I guess...I guess I'll just see you around, then.
Pin It
Wednesday, July 16, 2014
Mug Makeover: Teen Witch Edition
There are very few things that are important to me in life. I'm usually a "give zero effs" kind of gal (bleh), but that does not hold true when it comes to one of my favorite movies of all friggin' time -- Teen Witch.

If you can't get down with an 80s movie that involves witchcraft and chicanery for popularity's sake, heavy use of tutus and denim jackets, and delightfully awkward rapping, then I don't have time for your silly nonsense. So when I tell you that I have created a Teen Witch beauty tutorial, your ass should not be surprised.
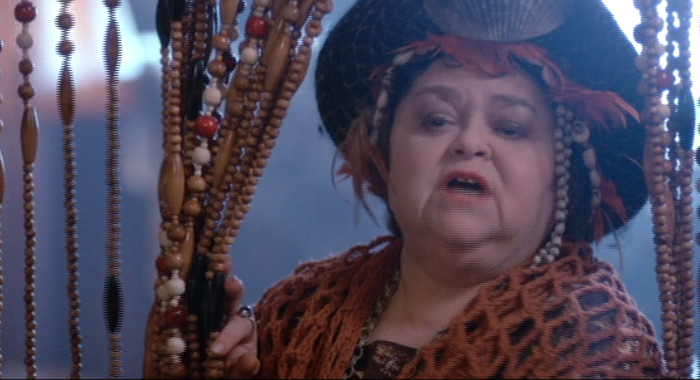
And without further dramatics, I present to you my most meaningful beauty look that I have ever created. Sadly, it's not the old lady witch that was also in Poltergeist. Maybe next time.

I would recommend using a sturdy-ass, Aqua Net-esque hairspray if you want your hair to stay. I just used texturizing spray because I wasn't trying to be hard-haired and authentically 80s, so, whatever. Choose your own hair adventure.

You can totally use an eyeshadow as a brow powder. Just please, for the love of Yeezus, CHOOSE A DAMN MATTE SHADOW.

Use whatever neutral eyeshadow you've got hanging around for this part. I prefer to do shimmery on the lid and matte on the crease, but do what your heart tells you to. Especially if you're a young buck. Your eyelids still have years sans-crepe, so play on, playa.
 If you're oily, go for a gel liner or a long-wear liner, or you WILL look a hot mess in 13.5 minutes.


Use whichever gloss or 'stick you're into, just keep it in the coral or peach tones. I think that that's the theme of the day -- do whatever the hell you want. Kind of.

Okay, all done! My hair's not AS 80s as real Louise's, but you get the vibe. Do you guys love Tee Dubs as much as I do? Does anyone even know what I'm talking about right now?

Supersonic, idiotic, disconnecting, not respecting, who would really ever wanna go and top that?!?
Pin It
If you can't get down with an 80s movie that involves witchcraft and chicanery for popularity's sake, heavy use of tutus and denim jackets, and delightfully awkward rapping, then I don't have time for your silly nonsense. So when I tell you that I have created a Teen Witch beauty tutorial, your ass should not be surprised.
And without further dramatics, I present to you my most meaningful beauty look that I have ever created. Sadly, it's not the old lady witch that was also in Poltergeist. Maybe next time.
I would recommend using a sturdy-ass, Aqua Net-esque hairspray if you want your hair to stay. I just used texturizing spray because I wasn't trying to be hard-haired and authentically 80s, so, whatever. Choose your own hair adventure.
You can totally use an eyeshadow as a brow powder. Just please, for the love of Yeezus, CHOOSE A DAMN MATTE SHADOW.
Use whatever neutral eyeshadow you've got hanging around for this part. I prefer to do shimmery on the lid and matte on the crease, but do what your heart tells you to. Especially if you're a young buck. Your eyelids still have years sans-crepe, so play on, playa.
Use whichever gloss or 'stick you're into, just keep it in the coral or peach tones. I think that that's the theme of the day -- do whatever the hell you want. Kind of.
Okay, all done! My hair's not AS 80s as real Louise's, but you get the vibe. Do you guys love Tee Dubs as much as I do? Does anyone even know what I'm talking about right now?
Supersonic, idiotic, disconnecting, not respecting, who would really ever wanna go and top that?!?
Pin It
Monday, July 14, 2014
What's Up, Smashbox Master Class Palette III?
I was forced to shclep my lazy ass across town to the ol' Sephora today, because I was dangerously low on the love of my life, the Marc Jacobs Magic Marc'er. I've shoved 10 months of use in a six month expiration bag with that puppy, and it was way past friggin' time. Drier than a bone status.
While I was re-upping on my homie, OF COURSE my eyes had to wander over the rest of the store's offerings. What am I, a nun? While on this peruse-fest, my eyeballs fell upon a true beauty: the Smashbox Master Class Palette III -- Color & Contour. I really was in no mood to purchase this mofo. It's $65, and I'm not exactly at Scrooge McDuck-levels of wealth right now.

But when I cracked this b open, I knew I was sold. Guess I'll eat garbage the rest of the month. Whatever. The first thing that you see are several tutorial sheets on how to do a bunch of fun shit like contouring and specific fancy eyeball things. The back cover has blank face charts so you can create your own little makeup looks. So artsy! It's very fashion plates-y and exciting.
Then you get to the real good good. Try to contain your oooooh and ahhhhs. TRY, I SAY!

What really convinced be to get this thing was the wide variety of shades in shadows and the inclusion of not only three totally wearable blushes, but also completely matte versions of a countour color, bronzer and highlighter. It's pretty much as close to perfection as anything can get for my ass. And eyelids. And face parts.

 I decided to just play around a tiny bit with some of the brighter and more unique colors. I really like a solid 97% of the shadows, and I feel like it might make my mediocre ass branch out a little more and use more color on my eyes.

I also took a hot minute to throw some contour/highlight/blush-type characters on my mug. Everything blends really, really well, and I feel like it will work well for most skin tones. My very fair and deeper skinned peeps, you might want to check the palette in person to see if the countouring shades would work for you.
Overall, here's my justification for getting this b: if I'm paying $50-ish a palette for ten-ish shadows, why in effs sake would I not plop down 15 more clams for, like, four times as much shit? This is a no doy for me. Broke assness be damned.

If you want to see all the specifics on this baby, check it here.
Pin It
While I was re-upping on my homie, OF COURSE my eyes had to wander over the rest of the store's offerings. What am I, a nun? While on this peruse-fest, my eyeballs fell upon a true beauty: the Smashbox Master Class Palette III -- Color & Contour. I really was in no mood to purchase this mofo. It's $65, and I'm not exactly at Scrooge McDuck-levels of wealth right now.
But when I cracked this b open, I knew I was sold. Guess I'll eat garbage the rest of the month. Whatever. The first thing that you see are several tutorial sheets on how to do a bunch of fun shit like contouring and specific fancy eyeball things. The back cover has blank face charts so you can create your own little makeup looks. So artsy! It's very fashion plates-y and exciting.
Then you get to the real good good. Try to contain your oooooh and ahhhhs. TRY, I SAY!
What really convinced be to get this thing was the wide variety of shades in shadows and the inclusion of not only three totally wearable blushes, but also completely matte versions of a countour color, bronzer and highlighter. It's pretty much as close to perfection as anything can get for my ass. And eyelids. And face parts.
I also took a hot minute to throw some contour/highlight/blush-type characters on my mug. Everything blends really, really well, and I feel like it will work well for most skin tones. My very fair and deeper skinned peeps, you might want to check the palette in person to see if the countouring shades would work for you.
Overall, here's my justification for getting this b: if I'm paying $50-ish a palette for ten-ish shadows, why in effs sake would I not plop down 15 more clams for, like, four times as much shit? This is a no doy for me. Broke assness be damned.
If you want to see all the specifics on this baby, check it here.
Pin It
Saturday, June 28, 2014
Mug Makeover: Gwen Stefani Edition
The other day I was reading this article over at Refinery29, and came across this bomb picture of Gwen Stefani. It was like watching Jonathan Brandis (RIP) in Ladybugs** -- I fell in love all over again. GS is usually looking consistently fly, so it's not like I expected anything different from her ass, but I feel like this makeup look is slightly different from her regular deal and I wanted that shit on my face immediately.
I've recreated it below in a few easy steps, so read on, reader, if you
want Gwennie's glorious face on your face. (Without getting all Buffalo Bill-y
and illegal.)
P.S. I would (almost but not quite) literally kill for that kimono.
I started with the eyes, which are really pretty simple and low key, with a touch of shimmer. (But NOT glitter, the nemesis of soul windows everywhere.) I'm using the Lorac Starry-Eyed Baked Eye Shadow Trio in Pro Star, which I can't friggin' find anywhere, but this Superstar palette ($27) is super-similar.

Start by applying a shimmery brown shadow from the crease to the lash line.

Follow up by using a light bronze-y eyeshadow in the crease and also on the bottom lash line.

Next apply some black liner on the upper lash line only. I'm pretty ride-or-die liquid liner in this situation, but live your life and use whatever eyeliner you like. I used the Marc Jacobs Magic Marc'er Precision Pen Waterproof Eyeliner ($30) because I LOVE THAT SHIT.

Finish off with a powerful mascara, because Gwen's lashes be bangin' in this face case. I'm using Rimmel Scandaleyes Rockin' Curves Mascara ($6.99), that CVS Beauty Club so kindly sent me to sample, along with the Rimmel lipstick that I use in a hot minute. The mascara is actually pretty boss. It makes my lashes seem as long as a Real Housewives Reunion show, parts one through seven, but 309485% less boring.

For lips, I started by lining with MAKE UP FOR EVER Aqua Lip Waterproof Lipliner Pencil in Bright Baby Pink ($19), because it's just what I happened to have lying around. Once again, use what you wish, but definitely use a liner with a bright lip like this to prevent that rude bitch, lipstick feathering.

The last step is to throw on a bright reddish-pink lipstick, like Rimmel Moisture Renew Lipstick in As You Want Victoria ($6.99). I really enjoy the shade of this 'stick, but I had to get used to the moisturizing aspect. I'm usually more of a matte lip kind of mofo, so I had to do some reapplying as the hours ticked by. But the formula feels like a dream, so it's worth the extra seconds of reapply time.

That's it, here's the finished product. I might not look as much like a flawless creamy-skinned elf as Gwen, but I'm completely into this face.

What do you guys think? Are you into Mizz Gwen's look? You don't even know how hard I had to fight against making a "Hella Good" reference here, so tell your brains "you're welcome" for the reprieve from my typical terrible puns.
** I used to carry around a folded-up pictures of Jonathan Brandis in my pocket in Elementary school. I was an avid reader of Tiger Beat, Big Bopper, et al, and I would rip out pictures of JB and carry them until they pretty much deteriorated into ransom-letter-like scraps.
Pin It
 |
| pic via refinery29 |
P.S. I would (almost but not quite) literally kill for that kimono.
I started with the eyes, which are really pretty simple and low key, with a touch of shimmer. (But NOT glitter, the nemesis of soul windows everywhere.) I'm using the Lorac Starry-Eyed Baked Eye Shadow Trio in Pro Star, which I can't friggin' find anywhere, but this Superstar palette ($27) is super-similar.
Start by applying a shimmery brown shadow from the crease to the lash line.
Follow up by using a light bronze-y eyeshadow in the crease and also on the bottom lash line.
Next apply some black liner on the upper lash line only. I'm pretty ride-or-die liquid liner in this situation, but live your life and use whatever eyeliner you like. I used the Marc Jacobs Magic Marc'er Precision Pen Waterproof Eyeliner ($30) because I LOVE THAT SHIT.
Finish off with a powerful mascara, because Gwen's lashes be bangin' in this face case. I'm using Rimmel Scandaleyes Rockin' Curves Mascara ($6.99), that CVS Beauty Club so kindly sent me to sample, along with the Rimmel lipstick that I use in a hot minute. The mascara is actually pretty boss. It makes my lashes seem as long as a Real Housewives Reunion show, parts one through seven, but 309485% less boring.
For lips, I started by lining with MAKE UP FOR EVER Aqua Lip Waterproof Lipliner Pencil in Bright Baby Pink ($19), because it's just what I happened to have lying around. Once again, use what you wish, but definitely use a liner with a bright lip like this to prevent that rude bitch, lipstick feathering.
The last step is to throw on a bright reddish-pink lipstick, like Rimmel Moisture Renew Lipstick in As You Want Victoria ($6.99). I really enjoy the shade of this 'stick, but I had to get used to the moisturizing aspect. I'm usually more of a matte lip kind of mofo, so I had to do some reapplying as the hours ticked by. But the formula feels like a dream, so it's worth the extra seconds of reapply time.
That's it, here's the finished product. I might not look as much like a flawless creamy-skinned elf as Gwen, but I'm completely into this face.
What do you guys think? Are you into Mizz Gwen's look? You don't even know how hard I had to fight against making a "Hella Good" reference here, so tell your brains "you're welcome" for the reprieve from my typical terrible puns.
** I used to carry around a folded-up pictures of Jonathan Brandis in my pocket in Elementary school. I was an avid reader of Tiger Beat, Big Bopper, et al, and I would rip out pictures of JB and carry them until they pretty much deteriorated into ransom-letter-like scraps.
Pin It
Subscribe to:
Posts
(
Atom
)